
Discover the joy of crafting your own beauty products with this simple and effective DIY lip balm recipe.
In the world of beauty and skincare, there’s a growing trend towards DIY solutions that are not only budget-friendly but also allow for greater control over the ingredients we put on our skin. A perfect example of this is making your own lip balm at home. It's a delightful way to ensure your lips stay moisturized and healthy, without the unnecessary additives found in many commercial products.
Why Go DIY?
Many store-bought lip balms contain ingredients like soy and canola oil, which may not suit everyone's skin type or personal preferences. By creating your own lip balm, you can avoid these unwanted ingredients and customize your balm to your liking.
The Benefits of Homemade Lip Balm
Advantages of Homemade Lip Balm
Natural Ingredients: Choose pure and natural components to ensure the best care for your lips.
Cost-Effective: Making lip balm at home can save money in the long run.
Customization: Add your favorite scents or essential oils for a personalized touch.
Creating your own lip balm doesn't require an extensive list of ingredients. In fact, you can make an effective balm with just a few staples that are likely already in your kitchen or can be easily obtained:
Simple Ingredients You’ll Need
Beeswax: Provides structure and sealing properties.
Coconut Oil: Offers hydration and nourishment.
Shea Butter: Adds an extra layer of moisture and smoothness.
Essential Oils (optional): For scent and additional benefits.
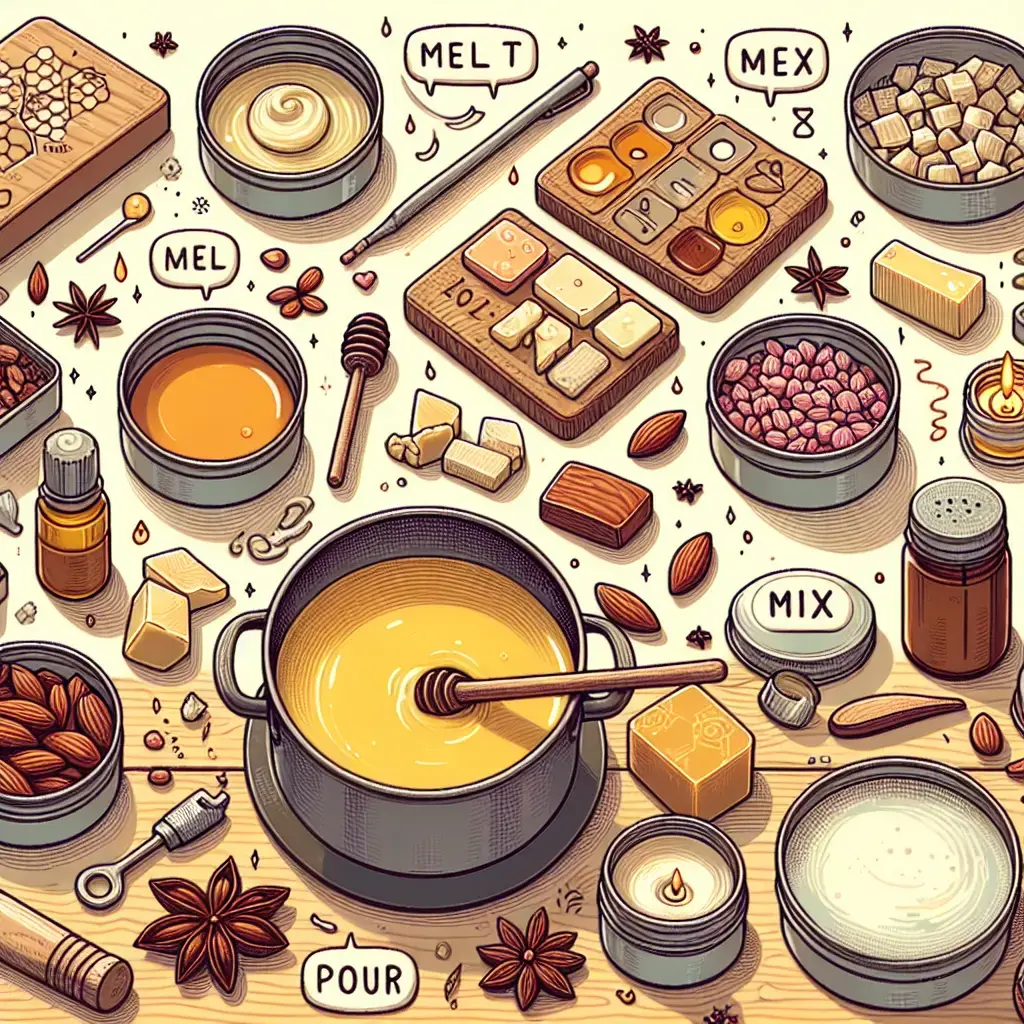
Step-by-Step Guide to Making Lip Balm
1. Gather Your Ingredients: Ensure you have all your materials ready before starting.
2. Melt the Base Ingredients: In a double boiler, gently melt the beeswax, coconut oil, and shea butter together until fully liquefied.
3. Add Essential Oils: Once melted, remove from heat and add a few drops of your chosen essential oil for scent.
4. Pour into Containers: Carefully pour the mixture into small tins or tubes while still warm.
5. Allow to Cool: Let the balm sit until it solidifies completely.
Tips for Success
Adjust the ratio of ingredients to achieve the desired texture. Experiment with different essential oils to find your favorite blend. Make sure containers are clean and dry before pouring in the balm to ensure longevity.
Creating your own lip balm is a rewarding DIY project that allows you to take control of what you put on your skin. Plus, it’s a fun way to experiment with different flavors and scents that suit your personal taste.
For more detailed guidance and inspiration, check out this helpful article.
Happy crafting, and remember – beauty begins with a personal touch!

Leave a Comment